Popovers are good to eat. Popovers are unpredictable. There isn’t very much to a popover. It is an ungainly-looking medium for getting butter, jams, jellies, and honey into the mouth.
The popover owes its fragile puffiness to steam levitation. It is done without yeast or chemicals of any kind. Only steam raises it high, and then drops it back down into a clumsy shape.
There should be at least one popover recipe in every home baker’s repertoire. This is a good one.
Thus Bernard Clayton in his excellent 1987 New Complete Book of Breads (and I see that there’s a 2003 edition). I’ve been using this recipe for a very long time, with never a failure. The problem, though, has been the pan. Whether I use glass or aluminum or steel, no matter what I grease or oil or butter it with, the damned popovers end up so firmly attached to their cups that I destroy them in getting them out.
No more. A while back I bought a set of silicone baking cups via Amazon. I’ve used them several times now, and the popovers are not only perfectly baked, they practically leap out of their cups onto our plates. The cups in question are by Lékué, though I rather think that the brand isn’t terribly important. I bought a set of six individual cups ($24); they’re also available in a six-cup pan ($11).
Here’s Clayton’s recipe using a blender; see the book for other versions:
1 cup bread or all-purpose flour (sift before measuring)
1/4 teaspoon salt
1 tablespoon sugar
1 tablespoon butter, melted, or salad oil
1 cup milk, room temperature
2 large eggs
Preheat oven to 375° or 400°.
Combine all of the ingredients in the blender and whirl at high speed for 45 seconds. Stop the blender and scrape down the sides after the first 10 seconds.
Fill the cups half full with batter.
Bake in the hot oven (400°) for a dark brown shell with a most interior, 40 minutes. Or bake at 375° for a light popover with a drier interior, 50 to 55 minutes. Be sure to keep the door of the over closed during baking to prevent a collapse under a draft of cold air. (If using a convection oven, reduce heat 50° in either case.)
I’ve never bothered to sift my flour. I always use oil (it’s easier). I’ve been giving the silicone cups a very light coat of oil as well, but today I tried one without any, with good results, so maybe it’s not necessary, making an extremely easy recipe even easier.
Go thou and do likewise.
Update 1: No yolk. I’ve been experimenting with a low-cholestrol version of this recipe, primarily by getting rid of the egg yolks. The substitution that seems to work best is to replace the two eggs with the whites of three eggs, and to add a second tablespoon of oil. I tried packaged egg whites that we had lying around, and they were a total failure, perhaps because they’re pasteurized? The yolks go out to the compost pile, where they’re immediately consumed by the birds that are hanging around.
Update 2. If you’re casting about for a use for your digital kitchen scale, this recipe is a good application for it. Tare out a 2-cup (or bigger) measuring cup and pour the finished batter into it, noting its weight. I get around 490 grams with this recipe. Divide that weight by the number of cups you want to fill. In my case, that’s 7, giving me 70g per cup.
Then tare out a cup, and pour 70g, less a little bit (I aim for 67-68g) to allow for what gets left in the measuring cup, into each cup. Solves the problem I have with eyeballing each cup to the same amount of batter.
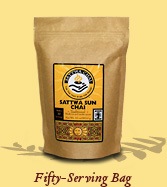 There’s a local (Half Moon Bay CA) joint that specializes in chai, but I found their product cloyingly sweet, with no real bite. Thankfully my brother introduced me to
 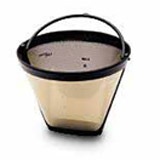 The instructions are simple: bring water and milk to a boil, add the chai and simmer, strain and add sugar. I steep for an hour (on low heat) instead of the recommended seven minutes, and am generous with the chai, stingy with the sugar. A gold coffee filter (like this one) works fine as a strainer. It keeps well in the refrigerator; steam or microwave to heat it up.